Turtles have the longest average lifespan of all pets. With proper care, they can live up to 40 years, depending on their species.
One of the most important aspects of a turtle’s lifespan is the condition of its shelter. Below, we take you through what you need to know when setting up a turtle tub and ways you can ensure it always remains in top condition.
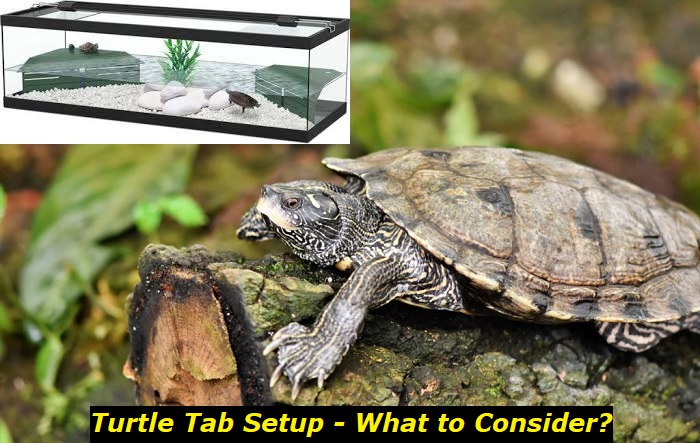
What should you consider before building a turtle tub?
At first glance, most successful turtle tubs look easy to build. And they are, but there are a few not-so-visible considerations that go into building one.
Below are some key factors to have in mind before putting on your fix-it gloves;
1) The Type and size of your aquarium
Generally, the bigger the tub, the better for your turtle.
Knowing your turtle’s species could help you determine the best tub for them. Some turtle species, such as the musk turtle, are only 5 inches at full adulthood.
The minimum size of tank you should use for small species such as these is a 30-gallon tank. These tanks will accommodate turtles between 4 and 6 inches. Turtles such as the red-eared slider and wood turtle that range between six and eight inches may require bigger tanks.
When choosing a tub, get a tank that can hold 10 gallons of water per inch size of your turtle. Remember to account for additional space that may be taken up by land area for their basking needs.
If you get a tank for your turtle before it is fully grown, remember to keep checking up on them so that you can upsize the tub as they grow.
Be sure to pick a tub that can withstand large volumes of water. Terrariums intended for land-dwelling reptiles might crack under the water pressure if the glass is not thick enough. Glass thickness between 6 to 10 millimeters is generally safe for turtles.
2) Land area
Most turtles require a combination of both land and water in their environments.
Land serves several purposes in an enclosure. It can be used for basking, breeding, and absorbing vitamin D.
Land areas could come in the form of floating driftwood, ready-made platforms, or even well-placed DIY rocks. Whatever type of material you decide to use, ensure it is placed in a way that facilitates easy movement.
The area you dedicate for land uses within your tub will heavily depend on your turtle species.
Semi-aquatic species, like the sliders, split their time evenly between land and water. They would appreciate a 50-50 ratio of the two.
Aquatic species, however, tend to prefer living in the water. In fact, they rarely visit the land. In spite of this, allocating them some land area is vital for their metabolism. These types of turtles could do well in a tub with 25% land and 75% water. Some types of aquatic turtles include the western painted turtle.
3) Water.
Water is a vital component of your pet turtle’s health in its enclosure.
The water level in your tub must be two or three times more than the shell height of your turtle. This makes your pet turtle turn easily in the water without getting stuck face up.
The water in the tub must also be maintained at certain heat and quality conditions. An aquarium water heater is a perfect accessory to maintain the required temperature within the tub.
Turtles are known to be messy eaters. They also produce a large amount of waste. For this reason, you will need to get a good water filter.
4) Lighting and heating.
Turtles typically need 12-14 hours of constant sunlight daily to remain healthy. A good tub lighting system should fulfill both UVA and UVB light requirements. UVA is necessary for stimulating vitamin D production in the turtle, and UVA light encourages activity.
Heating the basking area allows your pet turtle to absorb vitamin D3. The optimum temperature for most turtles in the basking area is 85-90°F. Sit your lamps 12 inches above the basking area to prevent the risk of burning your turtle.
The water should be cooler than the basking area. A water temperature of 74-82 °F is ideal for most turtles. Still, your turtle might require special considerations depending on its age, species, and health.
Place your thermometer on the side of the tank farthest from your heater to avoid getting a false reading. Monitor the temperature regularly to ensure everything is going well within the tub.
The choice of water heater for your tub will also depend on its size. A 20-gallon tank would be suited to a 100-watt heater. Consult your pet turtle expert to pick the best heater for your tub.
5) Choice of substrate
When choosing a substrate, consider picking one that is soft to prevent any harm to your turtle’s underbelly. Avoid substrate that your pet can mistake for food. Substrates with small rocks, pebbles, or balls could be choking hazards.
How do you build a turtle tub? A step-by-step guideline.
Step One: Positioning your turtle tub
A good placement spot for your turtle tank would ideally be strong enough to support the weight of the tank. Keep the tub away from windows to reduce draft and natural sunlight from hitting it directly and affecting the temperature inside the tank.
If you have no other choice of location other than near a window, make sure to properly seal gaps in the windows and insulate the walls.
Step Two: Laying your substrate
Not every tub requires a substrate, but it helps to stimulate the turtles. Sand is a good choice of substrate since most turtles will pass it naturally if ingested. Some other choices of substrate include gravel and fluorite. A look into the requirements needed by your turtle species will inform you what substrate fits them best.
A point to note is that substrate should have a diameter larger than 0.5 inches to prevent choking or impaction.
Lay out the substrate evenly at the bottom of the tub.
Step Three: Adding water and the basking platform
Add water that is two or three times the shell size of your turtle. Make sure the water has no impurities or chemicals that could affect your turtle.
Place the basking platform in such a way that it floats on the water while still providing easy access in and out of the water.
Step Four: Setting up a filter
It is up to you whether to use an internal or external filter. No matter the choice of filter, it should be capable of handling twice the volume of water in the enclosure.
Canister filters are more common for large tanks. They sit outside the tank and can easily be hidden behind a cabinet or well-placed decoration. Most internal filters are only suitable for tanks under 100 gallons.
Step Five: Lighting and heating
The basking area should be the hottest part of your tank, and the water, the coolest. To create this gradient, place your lighting and heating lamps overhead in your basking area.
UVB light should form the bulk of the lighting. Running the lights in cycles of 10-12 hours of light and dark should simulate natural daytimes.
Water heaters can either be external or immersed in the tank.
Step Six: Introduce your turtle to its Tub
After making sure everything is in order, it is time to introduce your turtle to its new home. Monitor your turtle for any signs of discomfort while ensuring that all the conditions in the tank remain at their optimum state.
How to keep a turtle tub clean?
A dirty tank is an easy way to make your pet turtle sick. Dirty water in the tank usually looks cloudy, and it could also be smelly.
Not to worry, there are many ways you can keep your tub clean and your turtle happy. Some of these methods are listed below.
1) Use a filtration system.
Get a good and strong filter system for your turtle tub. It is advised that you use a filter that can clean at least double or thrice the volume of water in your enclosure. This will help you cut down the number of times you need to replace the water.
2) Regular water changes.
When you regularly monitor the water quality in the tub, you will be attuned to the slightest changes in water quality.
Replace part of the water with fresh water as frequently as your turtle tub demands.
A good time to replace water is soon after feeding your turtle. Scooping out any floating food waste particles will help in decreasing the number of times your tub needs a water change.
Water testing kits might also come in handy while deciding whether to change the water in your tub. These kits enable pet owners to measure the level of chemicals such as ammonia or nitrates in the water. They are not a necessity, but they will help you be more sure when to conduct a complete or partial water change in your turtle tub.
3) Feed your turtle outside its tank.
While it may be easier to feed your turtle within its tub, consider taking it out of its enclosure to reduce some of the waste from the food. This method will be particularly helpful for messy foods. It has the advantage of reducing the amount of reducing rotting food particles within the tub at a time.
A separate container for feeding might also help reduce excreted waste in the tub since most turtles will eject soon after eating.
It is important to closely monitor your pet turtle for any signs of discomfort should you use this method. Note that turtles are sensitive to temperature changes, so your environment will need to be at relatively the same temperature as its tub.
Building and maintaining a turtle tub does not have to be a daunting exercise. Following the tips and steps above is a surefire way of creating a wonderful home for your pet.
- Pacman Frog Looks Deflated – What’s Wrong and What to Do? - August 7, 2023
- How to Put Snake Back in Cage after Feeding? Important Concerns - July 31, 2023
- Repta Boost: Instruction, Considerations, Ways to Use - July 24, 2023