Your reptile enclosure must be conducive enough for your reptiles to breathe fresh air. It must have no life-threatening chemical substance that could shorten or terminate the life of your reptiles. In choosing a great coat to finish off your reptile enclosure, “Is Polycrylic safe for reptiles?” is the question for every thoughtful reptile keeper.
This article discusses the question of whether Polycrylic is safe for reptiles! It also suggests alternatives and tips that assist you in making a sound choice when choosing a finishing coat.
At the end of this post, you will have expert knowledge about polycrylic and other coat finishers, the safety of using Polycrylic and other alternative coats, the differences between Polycrylic and other coats, and some natural coats that are safe for your reptiles.
What is a Top Coat
“Top coat” is a term that is similar to a “poly finish” or “clear coat”. It refers to a visible protective finish applied on a painted or stained surface. Apart from its aesthetic function, it protects the surface against water, abrasions, dirt, and other damaging pressures.
They range from natural and environmentally friendly products such as varnish, shellac, lacquer, linseed oil, and more to synthetic and chemically produced products such as Polycrylic and polyurethane.
Polycrylic
Technically, it is a protective coating that is water-based as opposed to oil-based coats. It is also the name of a brand name for Minwax, a company in polyurethane production.
Polycrylic is a protective finish that is majorly applied like paint to woodworks such as a wooden reptile enclosure. This protective finish works like a protective coat on the surfaces to protect the reptile enclosure from water and other solvents that can damage its surfaces over time.
Polycrylic does more than protect the enclosure of your reptile. It also adds style and beauty to the enclosure. Although this would depend greatly on the type and hue of Polycrylic you use in the end, it can give your enclosure a glossy finish and, in many cases, a fine color. It dries quickly so that you can recoat it as much as you need to form greater protection and quality. It also withstands warm water, but it cannot tolerate high heat as well as oil-based polyurethane.
Is Polycrylic safe for reptiles?
This question is important because applying a coat with chemical substances that are harmful to the health of your reptiles may cause their death.
Polycrylic is a water-based product. It is easy to work with because it does not smell like other coating alternatives. Also, it has a lesser level of toxicity. This makes it easier to work with when compared to other alternatives.
Polycrylic is environmentally friendlier than other alternative coats. Its water-based formula makes it possible to clean it with soap and water easily. It has fewer volatile organic compounds, which ensures that it does not produce the harmful and toxic fumes of alternative coats. It has a slight odor, but it is not as toxic as alternatives so you won’t need a protective outfit and gears during application.
Polycrylic is also non-flammable and resists abrasion damages such as bruises, shaving, and chemicals.
Note:
Manufacturers of Polycrylic and many other protective coats often advise adequate ventilation when applying protective coats.
Application of Polycrylic

Use a Brush or Roller
It is recommended that you apply the Polycrylic with a good bristle brush or a roller, just like any other regular type of finish. Polycrylic is made as an aerosol, but you will only need it if you’re applying it on a surface that is full of contours. It would be difficult to work such an irregular surface evenly with a roller or brush.
During the application, it would be best to apply the Polycrylic in long strokes of a single direction. You may leave streaks or brush strokes if you apply it to the woodwork in short back and forth strokes. It would be best to apply the Polycrylic in thin, uniform coats. Ensure to brush out drips. It would also help to work from wet regions towards dry regions.
Light Sanding Between Coats
Light sanding between each coat will help to make the Polycrylic stick better. Manufacturers usually recommend three coats. It would be best to sand lightly between each coat and remove most of the dust with a vacuum cleaner or any better cleaner. It is recommended that you allow each coat to dry for at least two hours. You mustn’t sand the last coat.
Sanding the coats with steel wool to promote bonding is not advisable for Polycrylic. This is because Polycrylic is a water-based product, and water makes wool rust. So over time, remains of the steel wool left behind will leave rust particles in the finish, and the rust will eventually stain the finish in the long run. A light sanding will do just fine.
Best Top Coat Alternatives To Use
These alternatives are more natural, environment-friendly, and less toxic than Polycrylic. It would be best to go natural for the health of your reptiles if you want to try out alternative topcoats.
Best topcoat alternatives to use for your reptile enclosure include the following.
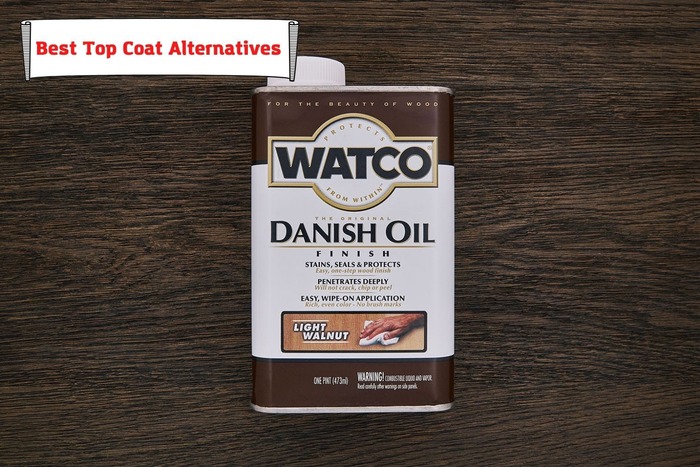
Danish Oil
Danish oil is usually a mixture of tung oil and varnish. Varnish is a visible protective coating that is used as a finish. It is often sold in various shades and usually has a yellowish shade from the production process. Tung oil, also known as china wool oil, is obtained from the seeds of the nuts from a tung tree. The oil is collected from pressing the seeds. The oil hardens once exposed to air through a process known as polymerization. The outcome is a visible and almost wet protective coating.
Danish oil works differently compared to other film finishes, which stay on the surface. It permeates into the wood surface to give an impressive finish.
Application of Danish Oil is really easy. The first step is to drench a piece of cloth in the finish. Spread the finish on the wood’s surface and let the wood absorb it for 15-20 minutes.
Clean off any excess oil. Then wait for at least 18 hours before recoating it because Danish oil dries over an extended period. It is recommended that you coat it at least three times.
To get a smoother finish, sand lightly with 600-grit wet-dry sandpaper between the second and third coats. Wiping the final coat enhances the glimmer.
For areas that are susceptible to moisture, scraping, and wear, use the oil with lacquer. This is important because Danish oil permeates the wood instead of building on it as film finishes do. In the event of abrasions, reapply Danish oil with some light wet sanding to revive the gloss.
Lacquer
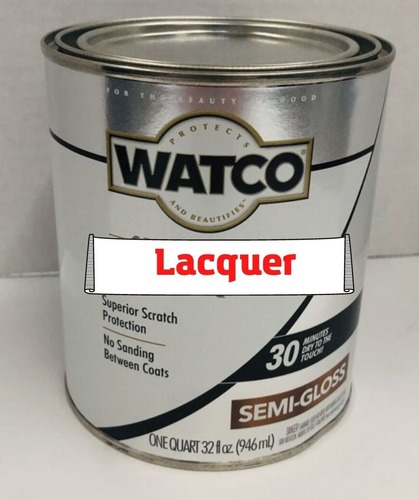
Lacquer is a durable finish that works well for a variety of woods. It covers a range of glimmering protective coatings that produce a durable and tough finish after drying by dispersing moisture. It comes in numerous types.
The most common of the numerous types of lacquer is nitrocellulose. Once dissolved in lacquer thinner, nitrocellulose gives a coat that settles the cellulose filaments in a film as the thinner dries up. This makes later toppings integrate into the prior layer. The benefit of the disintegration into earlier layers is that abrasions are easily repaired with light sanding and some cover coating.
Application of Lacquer is possible in different ways:
Spraying it. You may use a spray gun. Alternatively, you can use an aerosol can to apply the lacquer to the wood surface. Unlike other topcoats, lacquer dries fast within forty-five minutes. This means you can add a new coat in a short while.
Using Brushes. There are brushable types that also give great results. Unlike the spray types, which dry faster, the brushable formulas take about an hour and more to dry. It would be best to work fast to avoid brush marks.
It would also be best to use natural bristle brushes of high quality. Ensure that your workspace has adequate ventilation for perfect results. You may have to recoat up to five or six times for a sturdy film finish.
Sanding between the coats is unnecessary with lacquer unless you notice brush marks. To get rid of brush marks, sand lightly with 600-grit sandpaper and apply a final coat or two.
It is recommended that you do not apply lacquer on days with high humidity. You can buff the surface with steel wool and apply mineral oil shortly after the finish cures completely to improve the luster.
Note: You may think that a great alternative is polyurethane. It is an outstanding durable coating often used as an alternative for Polycrylic. But a comparison between Polycrylic and polyurethane reveals that it is not a great choice for your reptile enclosure. It poses health risks to your reptiles. It is far more dangerous compared to Polycrylic. It has higher volatile organic compounds than Polycrylic. This can cause respiratory problems for you and your reptiles.
Conclusion
Choosing a topcoat for any random piece of furniture is different from choosing one for the enclosure of your reptiles. Concerns for the health of your animals are a key factor in choosing a great topcoat. Topcoats that feature toxic chemicals should be avoided. If not, they must be allowed to cure properly before your reptiles can inhabit the enclosure.
Alternatively, you should prefer natural alternatives or ones with lesser volatile organic compounds.
- Dubia Roach Egg Sack: How To Understand if It’s Healthy? - January 2, 2023
- How To Feed African Dwarf Frog While on Vacation? - December 26, 2022
- Baytril for Bearded Dragon: Here’s What You Should Know - December 19, 2022